DIY Project (Do it yourself)
Magnets with your own photo
Fridge magnets with your own photo. A nice gift that will delight and enliven the space on the refrigerator. This small, creative project doesn’t take much time and isn’t expensive either. What you will need:
- Photos
- Magnetic sheet
- Scissors
For photos, you can choose ones you already have at home or you can print new ones. We will deal with printing photos as a collage later. The size of the photos is not fixed. I worked with a smaller size of 5×5 cm.
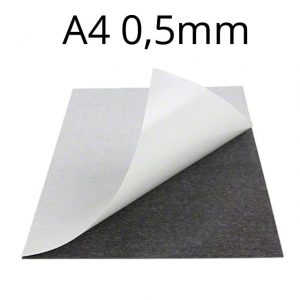
Key player – magnetic sheet
A high-quality magnetic sheet is the basis. Its use in the home can be versatile. It can be used as a holder for smaller tools, most often office supplies. And we certainly don’t want the objects on the sheet to slip or even for the entire sheet to fall. Sometimes, if you stick the sheet and don’t let it adhere enough, air bubbles can form under the sheet. For this project, I used magnetic sheet with a thickness of 0.5 mm.
Take the magnetic sheet in front of us and slowly remove its protective cover from the adhesive part. You don’t have to uncover the entire part in order not to damage the adhesive surface. Attach the photos one at a time so that they stick to the sheet as straight and as much as possible.
If you still have free space, feel free to save it for later photo magnets. The magnetic sheet does not become damaged and or lose its strength over time. Above all, its contact with neodymium magnets should be avoided. These could reduce its strength.
And magnets are here to enjoy!

How to print a photo collage on a home printer?
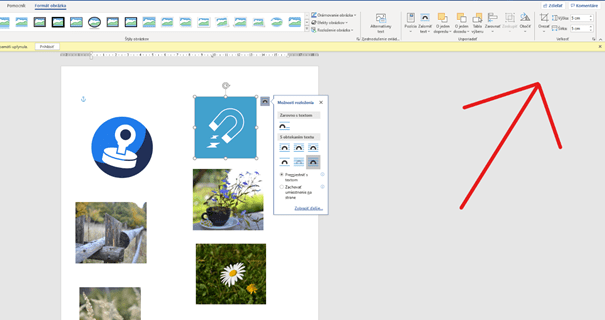
You have probably noticed that your home printer does not allow you to print multiple photos on one paper or create a collage. For this, you need to purchase a separate program that allows you to import photos and thus create collages directly for printing. We will show that it is possible even without a program. It is enough if you have Microsoft Word installed on your computer. You insert the pictures into word and arrange them nicely under each other. Then you set the desired size for each photo in the Image Format section.
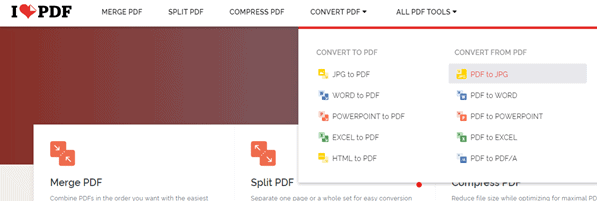
Once you have the photos sorted, select the option to export in the File section . Here we will see an offer to export PDF. PDF and Word files work great with text, but not with photos. Printing from these files would not give you a nice photo. The colours of the photo would not be clear and in places would not even be filled. Bright streaks would appear on the photo.
The last step is to convert the PDF file into a JPG (image) file. In such cases, I prefer to use the site: https://www.ilovepdf.com/, which provides me with free conversion of PDF files to various other formats.
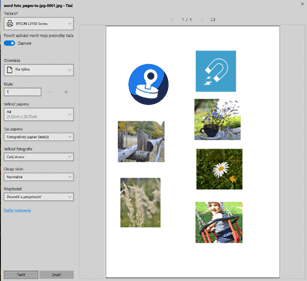
We will print the JPG format. When choosing a print, we choose the format for the whole page and must not forget to select the right photo paper. In my case, I use glossy photo paper. When we have already checked everything, let’s print and wait for the result.
Do not forget to work only with high-quality photos, preferably taken with a digital camera or SLR. Some phones may not provide sufficient photo quality, and transferring to different formats (as in our case) may damage them or diminish their quality. Now just repeat the procedure above with gluing the sheet and the magnets will be ready in no time.
Have you tried something similar? Let us know about your creative result! We look forward to your every photo.
You can find magnetic sheet not only for magnets, but also in our e-shop:
-
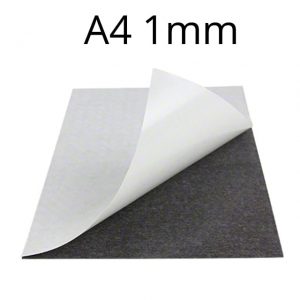 Self-adhesive magnetic sheet A4, thickness 1 mm – black
From 1 pcs: 4,40€ From 5 pcs: 3,75€ From 20 pcs: 3,49€ From 50 pcs: 3,29€ Ask from 200 pcs.
-
 Self-adhesive magnetic sheet A4, thickness 0.5 mm – black
From 1 pcs: 2,45€ From 5 pcs: 2,10€ From 20 pcs: 1,99€ From 50 pcs: 1,79€ Ask from 200 pcs.